So as mentioned before, I got myself a ve ssv ute loaded with plenty of mods, unfortunately during the previous ownership someone drilled a large 6mm hole in the throttle blade.
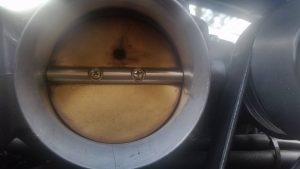
Now if your wondering why they did this it’s pretty simple. It was done as a quick fix, laziness or they just didn’t know how to tune the Electronic Throttle & idle control system properly for this camshaft.
The main reason why you would drill a hole in the blade of any car is it effectively allows more air straight into the manifold when the factory bypass won’t flow enough air, or the blade is movement limited.
Now that’s okay to do on the cable operated throttle bodies & even on some very large camshafts you will have no choice but to drill a hole even on a ETC controlled motor, BUT in this case for this particular engine combo it was not required at all. As you often end up creating more problems then you attempt to solve such as; exaggerated lumpy idles, cruise control effect when you back off the throttle, hanging idles when coming down through the revs or to a stop.
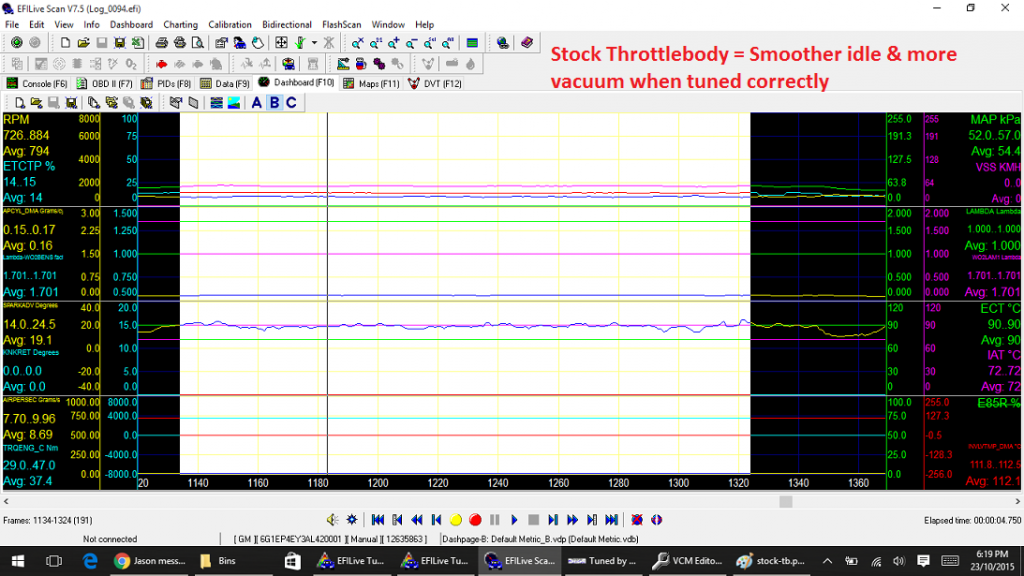
To give you an example, below is a screenshot log of my car in-gear with the original idle tune and 6mm hole throttle body from above. (Click to enlarge)

As can be seen in the log there are 2 things that stand out:
1) Large swing in timing & idle rpm
2) High manifold vacuum which leads to poor braking
This is because the ecu is commanding a set idle speed and is than constantly over-shooting then under-shooting it. To fix this the ecu can do 2 things, adjust the timing (reacts quicker) or adjust the tb position (slower reacting) to meet the requested idle speed.
I won’t go into the technical details on how this is fixed, because to most people it wont mean anything but needless to say once a throttle blade with no hole and the idle parameters are setup correctly, the idle ends up being a lot smoother without the excessively noticeable camshaft lope and more vacuum for braking. The results would be the same even with a hole, but only if your tuner has calibrated the relevant tables to compensate for the additional airflow.