In late 2025 I saved a 6lt Crewman from a sad fate at the wreckers, it didn’t look good initially as the engine would crank but not start. Eventually when i had time to play with it, i found the fuel pump was cutting out intermittently, which I traced back to the ground wire on the fuel pump module showing signs of getting hot with burn marks, so I fitted a new pump module & replaced the plug on the harness.
Fuel pressure was now back, however the engine still wouldn’t start, So in with a set of new spark plugs and it fired to life, with the car still up on jack stands from the pump replacement (as you need to remove the rear tub to get at the bastard), it was time to test the existing gearbox which resulted in 5 neutrals…

Oh well, No big deal as the intention was to throw out the garbage 4 speed and do the 6L80 upgrade anyway & do some more testing of later year engine & transmission operating systems, specifically VF OS code.
So, with the 4 speed removed & the engine taken out for a clean, it was then time to remove & replace the engine harness with a new factory looking unit which includes the 6L80 plug & associated wiring. To do this requires removal of the passenger footwell kick panel, where the factory T42 trans controller is located, along with the X211 connector which carries additional inputs/outputs from ECU to the body wiring.
For instance, the original PN signal comes via the old PN-safety switch that was fitted on the side of the 4l65, then ran into cab’s x211 connector to Pin 5, which runs under the dash to the drivers side to come out through the firewall with other inputs like throttle pedal, Transmission Output shaft speed etc to the ecu.
With the 6L80 installed & supported via the use of a new tubular transmission mount, the original 6L80 shifter rod goes straight into the factory VZ shifter, cooling is sorted via an adapter providing 2 x an6 male outlets to a couple of 90 degree push-lock fittings & hoses to a trans-cooler mounted in front of the condenser.
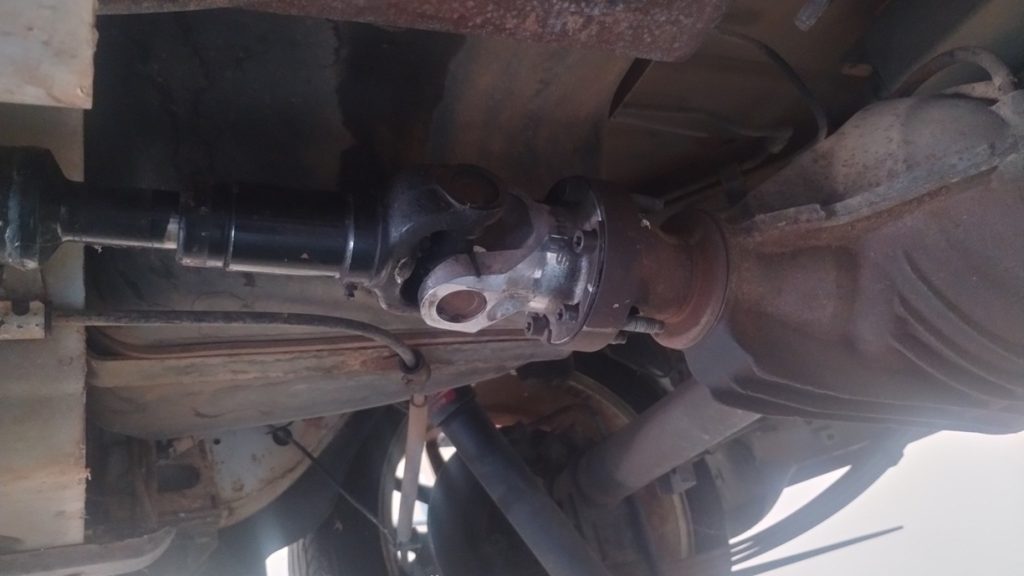
Tailshaft modification requires the front half to be lengthened along with spigot change as the 4l65 has a longer extension housing & male spigot mating. From donut face to middle of the center point bolts is 790mm on this car, the stock VE driveshaft while longer in this part, still falls short to what is required on the crewman, so required a new half shaft to be made up.

Next up is wiring for the paddle shift buttons on the steering wheel. This requires the use of a flat blade screw driver to pop the airbag off, after unplugging 2 additional plugs from the airbag, you can then remove the large nut holding the wheel in place.
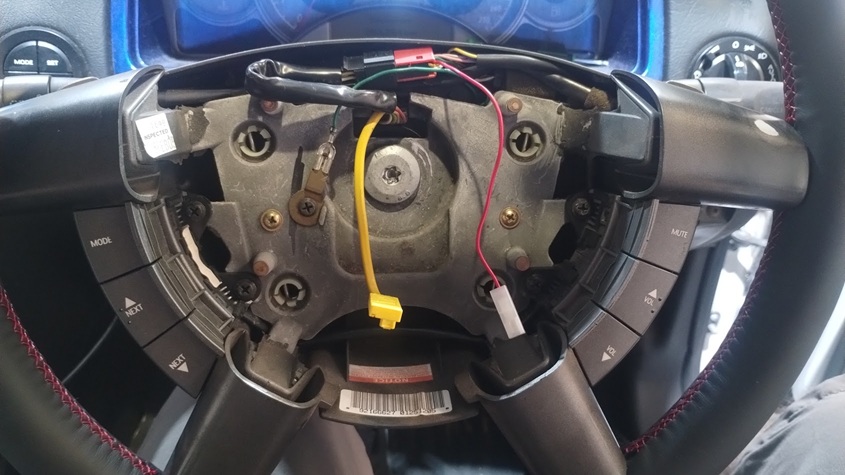
With the wheel off, it’s easier to add the 2 new wires that need to be ran from the vehicle side of the clock spring under the steering column cover.
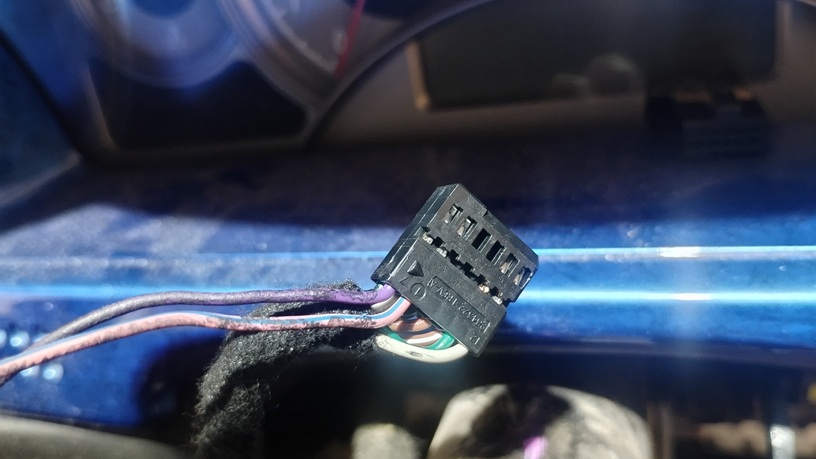
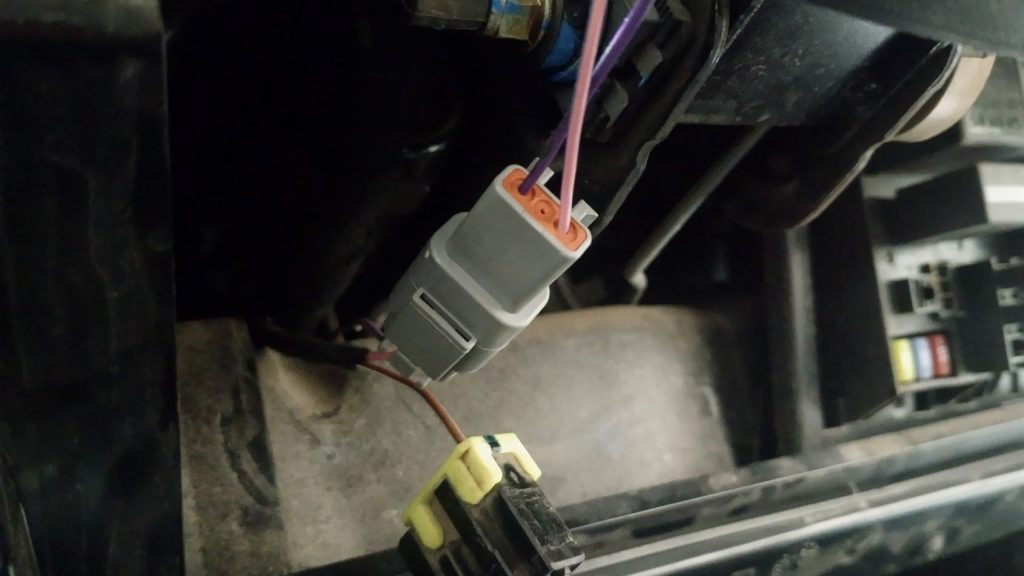
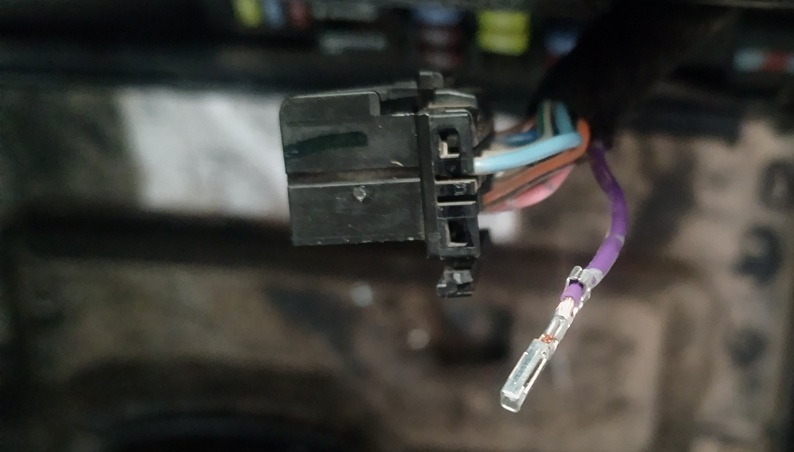
Switched 12v power to pin 8 & the tapshift signal to pin 7. In this scenario 12v is Pink\Blue coming from a unused factory plug under the steering column, Tapshift wire is Purple, both wires go to a Deutsch connector plug to aid with installation. With the cover put back on the plug, it’s re-inserted into the clock spring. While i was here i replaced the ignition switch & barrel as they were both flogged out.
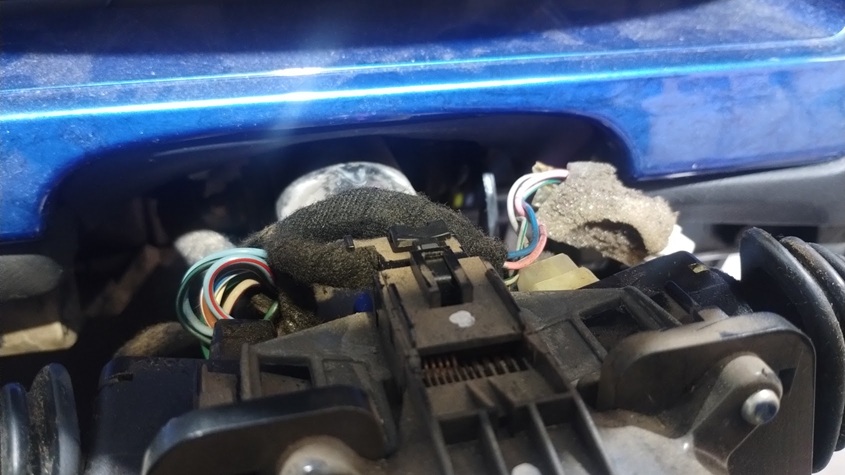
Using the deutsch connector allows for easy installation of the wiring coming from the passenger kick panel with the tapshift wiring & reverse light relay trigger.
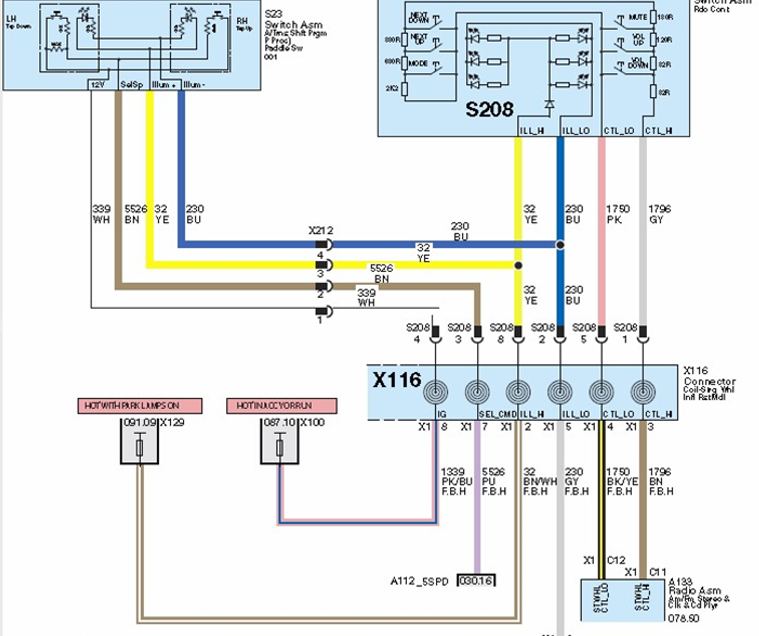
Factory wiring schematic for the steering wheel paddles
Reverse Light activation can either be done by wiring in the relay ground wire to the PIM module & then reprogramming it as a 5 speed gearbox with a Tech2. Alternatively you can wire in a micro switch inside the shifter assembly itself, that gets triggered when the shifter is moved to reverse. I’ve chosen to go the PIM route as it’s much easier for me to wire in & reprogram the PIM as a 5 speed so that it triggers the output.
An E38 ecu pin can be used for the PIM socket receptacle. Below is a picture of the factory pin type.
End Result